
These activities are also available in Romanian ![]() and in Dutch
and in Dutch ![]()
- ON
- IN
- WAVES (Moving up and down)
- STRAIGHT LINE
- AROUND
- IN BETWEEN/IN THE MIDDLE
- ON/TO/TOGETHER
- HIGH
- TOUCH
- UNDER
- LOOKS LIKE/ALIKE
- STEP
Download “Parent-Child Club #14-25” in pdf format
14. ON
Activities (choose one or more)
1. Put the written word ON somewhere in the room where everyone can see it.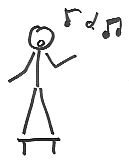
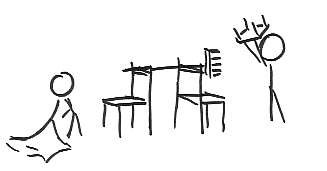
2. Have everyone sit in a circle on a chair. The leader stands on a stool. (A stool is a short, stable thing to sit on. Use a bench or a strong box if there are no stools.) Sing a song. Where is it easier to sing? (Sitting) on the chair or (standing) on the stool? Yes, ON the stool, because there you stand up.
Everyone takes turns standing ON the stool and singing a song in their own language.
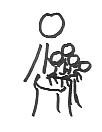 3. Children are now allowed to sit ON their mother’s/caregiver’s lap. How many children fit ON the lap of ______? Have the participants guess beforehand how many kids will fit. For example, two ON one leg and three ON the other. That will total five kids.
Let them then count for themselves in their own language.
4. A ball on your lap. Ask the group: “Can you keep this blue ball ON your lap?” “And ON the table?” Which is more difficult? Why? The ball is round and the table is flat, while your lap isn’t! Let everyone feel the ball.
5. Have the whole group describe five ordinary objects (for example, bucket, chair, box,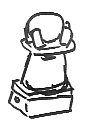 paper, pencil). Divide into smaller groups of 4-6. For a very small class, divide into pairs of parents and children. Give each group the same items. Which group can build the highest tower using these objects, by putting them ON top of each other? Name the objects in the children’s mother tongue.
Story and singing time
See FUNdament Instructions. This applies to every Story and Singing time in this section.
Craft time (choose one or more)
6. Needed: Paper, pencils or crayons. Let the students draw an object with something ON it (example: a head  with a hat ON it, a branch with a bird ON it, a chair with a child ON it). Talk about it while they work on it. When they have finished with one paper they may take another one. Write their names on the paper.
At the end, everyone may explain their own drawing in their mother language.
7. Make a (paper) hat with the children.
8. Sing a song with the word “ON” in it , if you know of one. If possible, have the parents also sing this in the mother tongue. English example: “A wise man built his house ON a rock.”
Closing: Everyone sits in the circle ON their chair to sing the closing song.
Put something in front of the door ON which the children cannot stand or walk. Everyone walks nicely around it when they go outside.
This teaches:
- Courage to take a clear stand; courage to speak up.
- Language development and awareness.
- The child becomes more aware of their body by focusing on how to stand and sit.
- Correct breathing (use of lungs, breathing from the diaphragm or abdomen) will result in a better voice.
15. IN
Activities (choose one or more)
1. Everyone gets a small object that they are not allowed to show others (bead, pencil, eraser, stone, feather or a ball of paper).
Explain that they have to hide it IN their hands. Let everyone say two things about the object in their hands (for example: its color, what it feels like, what is it made of, what it might be used for, where it came from). The others have to guess what each person is holding. The parents and children may use their own language to do this.
2. Needed: A box, each side painted a different color or covered with different color of paper; the box has a hole in bottom so you can put your hand into a hand puppet inside the box; a hand puppet inside the box. Explain that the puppet is IN the box. The puppet will only come OUT once the children have named each of the colors on the box. Have the children name them first in their own language, then in the national language.
 3. What’s IN the box.
Needed: Small box with an object IN it.
a. Have a mother show the contents of the box. The children are not allowed to say out loud what they see IN it.
b. The puppet tries to guess what’s in the box by asking “yes” and “no” questions. Children can only answer the questions with “yes” or “no” until the puppet has guessed what is IN the box.
For example:
Puppet: “What a nice box we have here. Do you know what is in it?”
Children: “Yes.”
Puppet: “Don’t tell me! Let me guess! Is it as big as this chair?”
Children: “No.”
Puppet: “Can you eat it?” (etc., until the puppet has guessed what the object is)
Story and singing time
Craft time (choose one or more)
 4. Everyone draws an object IN which you can put something or someone (house, bucket, box, cage, car, etc). However, do not draw anything IN it yet.
Once that drawing is finished, pass it on to someone else. Everyone gets another piece of paper to make a second drawing. This time, draw what could be put IN the object on the first drawing (possible examples: car – people, cage –animal, house – chair, bucket – water, box – frog).
 5. Mix up all the drawings. Have a child hold up the first two in the pile. Ask the class whether the thing in one drawing could go IN the thing on the other drawing. Make this a fun game. Silly “matches” are encouraged!
 6. Provide material for building a hut or tent (blanket, sheet, big boxes, chairs or
table…). The children should be able to go IN the hut.
7. Something to try: can you hold your thumb IN your hand?
Closing: Before leaving, the children get a sweet or some other small treat to eat. They have to put it IN their mouths.
What this teaches:
- When you hold an object in your hand, it makes it easier to remember the name of the object.
- Finding words to describe an object helps build the child’s vocabulary.
- This also helps the child to think about how to share meaning with someone else.
- They have to think about what the most important characteristics of the object are.
- They also have to speak clearly.
- They have to read the look on other people’s faces to see whether their own description was clear.
16. WAVES (moving up and down)
What this teaches:
- The participants learn to use their senses while learning to write.
- They practice hand and finger movements which are used in writing
- Drawing shapes also used in writing is another good way to practice.
Activities (choose one or more)
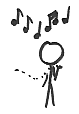 1. Sing a song, preferably one known to the participants. Point out that the voice goes UP and DOWN while you sing. Hum a tune going up and down. Move your finger up and down like a wave as notes in the tune go up and down.
2. Drop a cloth on the floor. 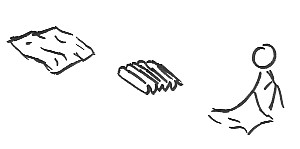
Point out how the wrinkles in the cloth go UP and DOWN. Ask for a volunteer to lay it out smoothly.
3. Ask how a snake moves. Talk about how a snake slithers in a wave motion. Ask who can make those beautiful waves with their hands. Practice having hands and arms move like a snake.
As always, check ahead of time that these motions and activities are culturally appropriate.
Story and singing time
Craft time (choose one or more)
5. Bake waves.
Needed: Bread dough, cookie dough or clay.
Everyone gets a piece of dough. Show how to roll the dough into a long, thin log. Show how to make wave patterns out of the roll of dough. Have the participants then do this themselves. Put it on a baking tray to bake at home or to let dry and harden until the next lesson.
6. Make waves.
Needed: Piece of string or yarn, paper, glue.
Give everyone a piece of string. Have them lay it on the shave of waves on the paper. Glue it down. Let them carefully feel the wave shape with a finger.
If desired, let the participants glue the waves from one side of the paper to the other. Then let them draw fish or other sea creatures below the wave shape and boats above it. Help them put it into the shape of waves onto the paper and glue it. Let them follow the string with their fingers and feel it carefully.
 7. Wave patterns.
Needed: Paper and something to draw with.
Make patterns of waves on the paper. Then have everyone turn the wave into a drawing (a snake, water, a flag, a cloth).
8. Finger drawing.
Needed: Nothing.
Work in groups of two. One person “draws” on their partner’s back with their finger. The other person guesses what the pattern is.
Closing: The group makes a long line by holding hands or by putting their hands on each other’s shoulders. The line moves in a waving pattern around the room and then goes outside.
17. STRAIGHT LINE
Activities (choose one or more)
1. Draw two straight lines parallel to each other on the floor with chalk (you may also use tape or lay down rope or…). Make sure there is enough space between the lines for several children to stand. Pretend the lines are the banks of a small stream. The students have to follow directions: “Stand IN the stream. Stand NEXT TO the stream. Stand ON the edge of the stream.”
You may also pretend this is a sidewalk, a path, a rug…
2. Have enough strings for everyone. (Ribbons, shoe laces, or yarn may also be used.) Show how a string can make a straight line if you pull on each end. Give everyone a string. Ask this question: When you straighten the strings and put them one after another so that they form a long line, how far will they go? From the table to the door (for example)? Try it out.
3. Divide the class into groups of four. Give everyone a string. Have the people in each group stand in order – from the person with the longest string to the person with the shortest string. Ask the students how they might measure the length of their strings. Then have everyone stretch his or her string out into a straight line in front of him/her so that everyone else can see it.
Story and singing time
Craft time (choose one or more)
4. Needed: pen (or pencil) and paper, for each participant. Ask everyone to draw a house or other building. Which lines are straight ones? Then ask everyone to draw a tree. Does it have any straight lines? If so, which ones?
5. Needed: pen (or pencil) and paper, for each participant. Ask them: “Which letters have straight lines?” For instance, H, I, L and V. Other letters have a straight line as well, like R, N and P. Write the letters with straight lines on the board or have students write them on their papers. NOTE: Not every alphabet has letters with straight lines.
6. Rhyming words. Sit or stand in a circle. Have one mother say a word in her own language. The person next to her has to say a word which rhymes. Go on around the circle, with each person saying a word that rhymes with the first one. (English example: can, man.)
Variation: Have one parent say a word in her own language. The person next to her has to say a word which starts with the same sound. Continue around the circle. (English example: man, mat.)
Closing: Have the class stand in four straight lines. At a certain signal, they may go outside, but they must keep walking in a straight line.
18. AROUND
Activities (choose one or more)
1. Give everyone a string (ribbons, shoe laces or yarn may also be used.) Tell them to tie it AROUND their wrist.
2. Stick out one finger and have it go AROUND and AROUND in circles. Turn on a song or sing a song. Have everyone wave their fingers AROUND in circles to the beat of the song. (First make sure that this is not an impolite gesture.)
You may also have everyone hold a pencil in one hand and move the pencil AROUND their other hand to the beat of a song. Do this as long as the song lasts.
3. Talk about a mosquito flying AROUND your head. Make mosquito noises. Choose a partner and have him/her make the mosquito sound, too, but at a slightly higher or lower pitch. Have the group listen. Do the mosquitoes harmonize? Or not?
Then have 3-7 members of the group stand in front of the others. Have everyone else close their eyes. Secretly choose several members of the group standing in front to be mosquitoes. Once the mosquitoes begin to sing, the people with their eyes closed listen carefully. They must try to guess how many mosquitoes there are (auditive analysis).
4. Play a game that has something to do with AROUND. Examples in English would be “Ring Around a Rosy,” “Here We Go Round the Mulberry Bush” or “Duck, duck, goose.”
If there is no such game in the local culture, you may want to have everyone stand in a circle and hold hands. The group walks or skips AROUND in a circle, still holding hands, while they sing a simple song.
Story and singing time
Craft time (choose one or more)
1. Give everyone a sheet of paper with five dots on it. The dots should be spaced far apart. Everyone draws a circle AROUND each dot. Then they draw a second circle AROUND each dot in a different colour. Keep drawing new circles so that the dots become bigger and bigger AROUND.
2. Have strips of paper long enough to fit AROUND each person’s head. Everyone decorates their strip of paper (with stickers, crayons, colored pencils, etc.). Fasten the ends of the strip so that the strip fits AROUND the person’s head.
3. Choose an object that looks different on each side. For example, a box with something different drawn on each side. Everyone walks AROUND the box. They take a good look at the box. Then one person walks AROUND the box again and describes what he sees (visual analysis, perspective).
Closing: Everyone forms a circle using their thumb and index finger and puts it AROUND their nose. Let them line up and walk outside like this. (Check first that this is NOT an impolite gesture. If it is, make up something else. For instance, put a box in front of the door. Everyone must walk AROUND the box before going out the door.)
19. IN BETWEEN/IN THE MIDDLE
Activities (choose one or more)
1. Sit in a circle. Everyone is sitting IN BETWEEN two other people. Go around the circle and have each person name who they are sitting IN BETWEEN.
2. Put a large number of small items on the floor. They are not in any particular order. Let everyone take a good look. Have them then take turns choosing one object and describing it by telling where it is: “It lies IN BETWEEN the (red can) and the (gray stone).” The others have to guess which object s/he had in mind. Anyone who knows, raises their hand. The leader calls on that person. If s/he guessed correctly it is her or his turn. Do make sure everyone gets a turn at describing an object. Also make sure the children learn to wait until they are called on to speak.
3. Put two cardboard boxes on top of each other. Put a piece of paper IN BETWEEN. How many pieces of paper fit IN BETWEEN?
Story and singing time
Craft time (choose one or more)
4. Everybody gets a piece of paper with a few three-letter words written on it (consonant, vowel, consonant; English examples: cup, dog, cat). Talk about the words. Have everyone puts a circle around the letter IN BETWEEN the two consonants.
Now say the whole word. Then, let the participants say the vowel, the sound written IN BETWEEN.
If appropriate, choose words in the mother tongue.
5. If no words in either the national or the mother tongue follow this sound pattern, use different sounds. For example, clap-stomp-clap. Have everyone do this together. Then ask them all to do the sound in the middle. Repeat with different combinations. Possible sounds include: clap someone else’s hand, slap your own thighs or arms, tap the chair or the ground, snap fingers (tricky), hoot like an owl, whistle like a bird…
A parent may also take a turn at leading.
6. Everyone gets a small piece of paper with a word written on it. Let them try to hold the piece of paper in a creative way IN BETWEEN fingers or hands (IN BETWEEN the wrists, the back of the hands, the fingers).
Participants may take turns leading. One child or parent shows a creative way to hold the paper, and everyone else has to try to copy. This can get really crazy if the parent-and-child pair up and try to hold the paper IN BETWEEN themselves — IN BETWEEN their foreheads; IN BETWEEN their elbows; IN BETWEEN their shoulders.
Scarves, other small pieces of cloth, or large leaves can also be used instead of pieces of paper.
Closing: The leader names two participants. The person sitting IN BETWEEN those two can leave. Continue until everyone is outside.
20. ON/TO/TOGETHER
Activities (choose one or more)
1. Write the word ON or TO somewhere, clearly visible, in the students’ mother tongue.
2. Everyone gets a string (piece of yarn, ribbon…). Let them tie it TO the leg of their chair.
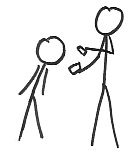
3. Set out at least four things that have something attached to them (a bucket with a handle, a cup with an ear, a bicycle pump with a pipe, a pan with a handle, a comb with teeth…). Talk about the objects. Ask the participants to describe each object: What is it? What is attached TO it?
Have a parent explain this in the mother tongue. Then the parent holds up the things one at a time. Each time, the children describe the thing and what is attached TO it in whatever language they use at home. The mothers listen and gently correct as needed.
4. Each set of parent-and-child gets a connecting toy to play with like Legos/Duplos; toy train; snap beads. Explain that they can make something by putting the parts TOGETHER. Have a time limit on this play time.
5. Give each set of parent and child a length of string or safe, flexible wire (pipe cleaner). Have them make a new invention by finding two things (that don’t belong together) and attaching them to each other. Then have them take turns showing and describing their creations to the group. The crazier the better!
Story and singing time
Craft time (choose one or more)
6. Needed: A straight strip of cardboard and a circle of cardboard (or paper) for everyone. Write a letter or number on the board which is made by attaching a circle TO a straight line (p, o, d, b, q, O). Let the participants copy the letter by putting down the strip and circle in the proper way.
If the local/national language uses a script without these shapes, consider making musical notes.
7. Give everyone or every parent and child a piece of paper with many letters printed on it. Let them circle the words that are put together with a strip/line and a circle attached TO it. Adapt to the local script if it uses letters without these shapes.
8. Play “train”. One person is the engine, the others are train cars. The “engineer” hooks different cars ONTO the engine. The engineer may ask each person what kind of car they are – passenger? Dining? Freight? Or he asks what kind of freight they carry – automobiles? Grain? Cattle? Each person hooks on TO the car ahead of them by putting their hands on their shoulders or around their waist. When all of the cars have been hooked TO the engine, the engineer blows a whistle and the “train” chugs around the room. “Engine” and “cars” may make appropriate train noises.
9. Each pair or set of parent and child ties themselves TO each other at the ankle. Have short three-legged races.
10. Show the students how to make a nice pendant for a necklace (use beads, nuts, any other art-and-craft). Or have them make a necklace or bracelet with things that are attached to each other – beads, hollow pasta, short lengths of plastic straws… Or have the parents show the children how to braid three pieces of colored yarn, ribbon or cord. The children can tie the finished braid TO their wrist or ankle.
Closing: The participants take someone by the hand and walk outside hand in hand. OR: Let them walk TO something outside. Let them put their hand ON the shoulder of someone else and walk outside.
21. HIGH
Activities (choose one or more)
1. Let everyone show how HIGH they can reach.
2. Play “I spy with my eye… something that is HIGH.” Begin by saying this yourself. The person who guesses what you see, then takes a turn seeing something HIGH up. (Make sure that there are items HIGH up in the meeting room). Go on until everyone has had a turn, or until the group looses concentration.
3. When you stand on something you are HIGHER. Who can show that? When somebody sits on your shoulders that person is HIGHER. Who can show that?
4. Pantomime doing things HIGH up. Examples might be window washing, picking cherries, the work of roofer, maintenance of streetlights, pruning trees, putting up decorations, paste advertisements on billboards, climbing a ladder, etc.
Story and singing time
Craft time (choose one or more)
5. Rhymes. Name three words that rhyme. Who can think of a word that rhymes with…? Start with the word for HIGH or for something that is HIGH.
6. Needed: piece of paper for each participant; coloring pencils. Have them draw something that is HIGH (an airplane, the sun, moon and stars, birds, clouds).
7. Have everyone cut out a nice shape or make a drawing on a circle of paper. Attach a string to each piece of art and hang them up HIGH in the classroom.
8. Make HIGHER-UP toys (stilts) for each child. Needed: two tin cans of the same size for each child (or two blocks of wood or two very strong plastic containers); strong cord or rope; a hammer and large nail to punch two holes into each tin can; markers or paper & glue for decoration. If desired, see https://babbledabbledo.com/tin-can-stilts for an example. When the stilts are finished, let the children practice walking HIGH.
9. Tell a story which includes HIGH activities. Have the participants act out the HIGH activities as the story is being told. Example: Joe had to bring a message to his father. First Joe had to climb a high mountain, up, up, up, higher, higher, higher, above the clouds. Then he had to jump high over a deep ditch/river. Next he had to take a trip high up in an airplane. Where was his father? He heard his father calling to him, from way up high. Joe shaded his eyes with his hand while he looked up high. He looked all around. Finally, he found his father sitting in a tree (or on top of a building). He had to climb a ladder (or climb the tree), higher and higher, to get to his father. Whew! He was glad he could finally lay down!
Have a parent retell the story in whatever language the parent chooses. Have everyone repeat the activities.
Closing: Everyone picks up his or her ‘pretend ladder’ and takes it with them while going outside. OR, if the children made stilts, have them use these to walk outside.
22. TOUCH
Activities (choose one or more)
1. Have everyone try to TOUCH the tip of their nose with their index finger.
Then have them try to do this with their eyes closed.
2. The leader calls out a part of the body. Everybody TOUCHES that part of their own body. Begin with easy (hand, ear) and increase the difficulty both in reaching and in vocabulary (heel, collar bone, shoulder blade).
When the group knows the game one of the mothers can lead; she calls a body part in the mother tongue. Make it a competition: let her call out the words faster and faster; who are the ones that keep TOUCHING the body parts correctly?
3. If it is inappropriate in the local culture to touch body parts publicly, play the game with some object – like the parts of a chair (leg, seat, back), parts of clothes (sleeves, button, pocket) or something else with several parts (trees?).
OR call out colors. When you say, “Touch green,” everyone must touch something green. You can repeat this with other colors: “Touch blue; touch black”, etc. Parents can take turns being the leaders. They may lead the game in whatever language they choose.
OR call out types of surfaces. “Touch stone.” “Touch wood.” “Touch glass.” “Touch plastic.” “Touch the ground.”
Story and singing time
Craft time (choose one or more)
1. Ballgame (perhaps do this outdoors). Make a goal (a basket, a rug on the ground, a cardboard box). One by one the participants have to try to TOUCH/ hit the goal by throwing a ball, a beanbag or a Frisbee-like item (paper plate).
2. Everyone gets a piece of paper. Have the participants draw circles on their piece of paper. Have them then exchange their paper with the person next to them. The next person tries to put a dot right in the middle of one of the circles, by TOUCHING its centre. Then, have them make a flower out of the circle together.
3. Good TOUCH/bad TOUCH. Show the outline of a human being or hold up a doll. Discuss what parts of a child are okay to touch and what parts are not. For example, in America it is okay for a stranger to shake someone’s hand, but it is not okay for them to touch someone’s knees. However, a doctor may touch someone’s knees to examine them. What parts are almost never okay to touch? What should you do if someone tries to touch you that way?
You may wish to give each parent a piece of paper with the outline of a human form on it. Together the parent and child might circle the parts that are okay to touch. Or they may color the parts that are not okay to touch one color and the parts that are okay another.
4. Sing a song that involves touching. English example: “Head-and-shoulders, knees-and-toes, knees and toes.”
Closing: Tag. One person is “it.” They try to TOUCH someone with their hand. Whoever is touched is ‘OUT’ and goes outside.
23. UNDER
Activities (choose one or more)
1. Secretly write a letter on a piece of paper. Begin the game by stepping on the paper. Say, “UNDER my foot is a (red) piece of paper. It has a letter written on it.” Name a number of objects that begin with the same sound as the letter. Have the participants guess which letter it is.
2. Give everybody a piece of paper with a letter written on it. Make sure that everybody knows which letter he/she has, and which words begin with that letter too. Try to do this exercise in the mother tongue too. Everyone takes a turn at being the leader.
3. What is UNDER? Have everyone sit in a circle. Go around the circle, saying something that is UNDER another thing. For example, “My foot is UNDER the chair” or “My mouth is UNDER my nose.”
Variant 1: This can also be played more actively. If someone says, “My hand is UNDER my chin,” everyone must put their hands under their chins.
Variant 2: People can take turns being the leader. Have the others in the group watch carefully. Is what the leader says true? Are the leader’s eyes really UNDER their mouth? Is the leader’s right hand really UNDER their left elbow?
Story and singing time
Craft time (choose one or more)
4. Place it under. Give everyone a coloring sheet with a pond or lake drawn on it and another sheet with fish, a boat, ducks, etc., drawn on it. Have them cut out these things and glue them on the first one. First discuss: Is the boat UNDER the water or is the water UNDER the boat?
Variant 1: Give everyone a sheet of paper. Have them draw a pond on it. Then have them draw at least two things that are UNDER water and two things that are ABOVE water.
Variant 2: This can also be done with the ground or with the roof of a house. Have people draw a line across the page for the ground. Then have them draw at least two things that are above the ground, like clouds, cars, children or trees and two things that are below ground, like worms, pipes, roots or basements.
5. Give everyone a sheet of paper with two boxes drawn on it, one above the other. Have everyone draw an object in the top box. Have them exchange papers. Have everyone name the object in the top box of the paper they now have. Then have them draw something in the bottom box that rhymes with the name of the item above.
6. Tell the story of a seed. Everyone receives a small box with soil in it and a seed to plant UNDER the soil. Encourage the participants to take care of it. Discuss how they can do this.
7. Which letters go UNDER the line. Give everyone a sheet of lined paper with letters printed on it. Draw examples of letters that go UNDER the line on the school board. Some have loops (g) and some have straight lines (p). Have the participants copy what you draw on the school board. Draw a red circle around the letters with loops and a blue circle around the letters with lines. (Note: this may not work with all writing systems.)
Variant: Give everyone a piece of paper with printing on it; it does not all have to be the same (newspaper, advertisement, paper menu…). Have the participants draw a colored circle around at least four letters that go UNDER the line of printing. See if they can find even more than four.
Closing: Place a table in front of the door. Everyone who wants to may go outside by creeping UNDER the table first and then going on through the door.
OR have two tall children/parents hold hands to make an arch over the door. Everyone walks outside by going UNDER the arch.
24. LOOKS LIKE/ALIKE
Activities (choose one or more)
1. The leader puts on a hat that does not match who he/she is. If the leader is a woman, she might put on a man’s hat. Now she LOOKS LIKE a man, but she isn’t. If the leader is a man he might put on a fireman’s helmet or a chef’s apron or… Now he LOOKS LIKE a fireman, but he isn’t, etc. Have a box with lots of different things in it. Have the participants take turns choosing something out of the box. Let them mimic using the item or being the person who would wear the item. The others have to name the item and guess who the person LOOKS LIKE. Possible items: toy microphone, farm or gardening tool, laundry things, cooking things, tool for building, car key, different hats.
2. Sounds alike. Divide the participants into two groups. Turn by turn someone stands in front. Have him or her say a word loudly and clearly. The next person has to say a word that sounds LIKE the first one, but which is slightly different, a rhyming word. Have him walk to the front and say it loudly and clearly. Which group can keep doing it the longest?
3. Looks alike? Have one participant sit or stand in a particular position. E.g. arms up and mouth open or sitting on a chair with their legs stretched straight forwards. Have someone else copy this, but they have to make a slight difference: arms up and mouth closed, or sitting on chair with legs stretched straight forwards but also pulling his own ear. The one who sees the difference first can have the next turn.
Story and singing time
Craft time (choose one or more)
4. Give everyone a piece of paper with many letters on it. Discuss the fact that some of the letters look ALIKE. Indicate the differences. Circle the letters that look ALIKE with the same colour (m, n, r ; o, p, b, d; l, i ; c, o ; v, w). This may be different if the participants use a different script.
5. Use a worksheet with two drawings on it that seem the same but have 5-10 differences. Give all participants a copy. Have them circle the 10 differences. Worksheets can be found on the internet or downloaded here: Worksheet Houses find differences.
6. Divide the participants into very small groups. Give each group a pile of small papers, of different shapes and colours. Have the group sort them in colour and shape into piles that are ALIKE. They look ALIKE but they are not (circles, ovals; rectangles, squares; triangles, right angled triangles; red/ orange; light-blue/dark-blue). Discuss the differences.
Closing: Sing two songs that sound ALIKE. Everyone walks outside to the beat of the last song.
25. STEP
Activities (choose one or more)
1. Everyone has their eyes closed. Make the sound of a several different kinds of footsteps. Have the people guess who is making the footsteps. (Heavy – bear, light – child, very small – mouse, with a limp – neighbour, etc.)
2. Divide the group into pairs and have one person stand behind the other. The person behind has to follow exactly the STEPS of the person in front. Ask them to be careful with their friend!
3. Two people have four legs. Again, divide into pairs. The person behind has to hold on to the middle of the friend in front. This time have the pairs STEP (walk, hop, run) together like a horse.
Story and singing time
Craft time (choose one or more)
4. Make STEPS. Dip the tips of your index and middle finger in some paint. Rub them over a long piece of paper. You leave a trace. Have a participant do the same with another color so s/he leaves another trace. Have them then draw where the traces are leading to.
5. Give everyone the letters of the word STEP. The participants have to put the letters in the right order.
6. Give everyone a piece of paper with one set of footprints on it. Prepare the papers ahead of time. Use several different kinds of footprints (little children’s bare feet, muddy male boots, delicate lady’s slippers, etc). Have the people make their picture by drawing a person that goes with the footprints. Have the group talk about what sort of person goes with what sort of footprint.
Closing: Sing a song and step to the beat. OR a drummer beats the beat on a drum. After a little practice we STEP to the beat outside.
Developed by Marleen Schönthaler, 2015
with A. Ivan Molla and M. van Rheenen
Illustrated by Ellen Holmes
Edited by Annelies Barth, 2021. Linked-In: Annelies Barth, Interpreter and Author